Tuesday, August 9, 2011

Comparison Shopping: Boots for Fall

Although I am one that thinks it is worth it to spend a little extra money on your shoes, I am also not against finding something equally as cute for a fraction of the price. These shoes not only look like its more expensive counterpart, but has almost the exact features.

FRYE- Belted Harness
Price $238.00

The classic Harness look combines with the added appeal of a belt buckle detail to offer tremendous style. Please note that leather type varies depending upon color.
Features & dimensions:
12" shaft height
2" heel


VS.

Mossimo Supply Co. (Target) - Katherine Leather Engineer Boots
Price $
59.99
Toe Style: Square Toe

Boot Style: Mid-Calf

Boot Shaft Height: Approximately 11"

Heel Style: Faux Stacked

Heel Height: Approximately 1.75"

Sole Style: Non-Skid Tread on Toe and Heel

Closure Type: Pull-On

Shoe Upper Material: Genuine Leather

Shoe Outsole Material: Thermoplastic Rubber

Shoe Insole Material: Faux Leather


Clarks - Desert Boot
Price $99.99
Lace-up style provides an adjustable fit
Fabric lining buffers the foot for allover comfort
Natural crepe outsole provides long lasting wear
1" Heel
4" Shaft Height


VS.

Mossimo Supply Co. (Target) - Khadeja Suede Booties
Price $29.99
Boot Shaft Height: Approximately 4"
Heel Style: Block
Heel Height: Approximately 1"
Sole Style: Non-Skid Tread on Heel
Closure Type: Lace Up
Shoe Upper Material: Genuine Suede
Shoe Outsole Material: Thermoplastic Rubber
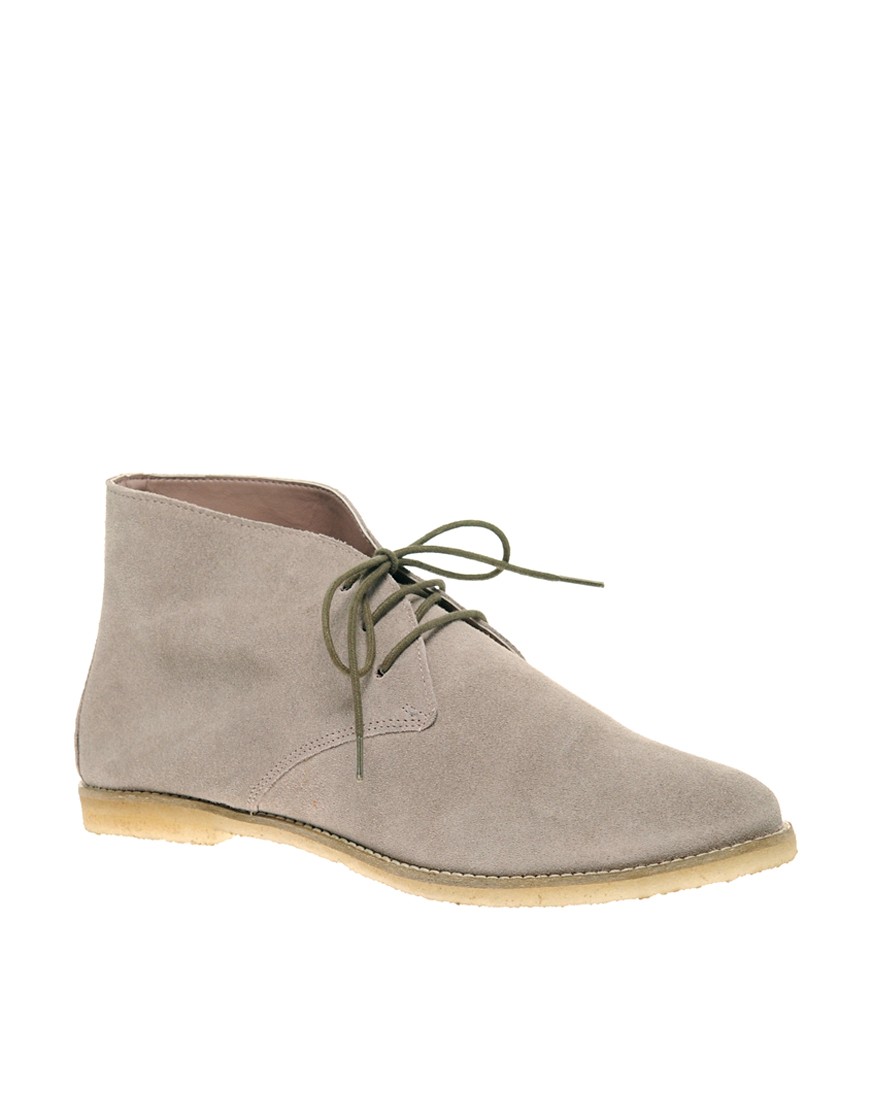
I tried these on recently and they are adorable! Sadly they did not have my size in stock. I will definitely be making a special trip to another Target to get them before they are gone!

OR
ASOS - ABE Suede Lace up Desert Ankle Price $68.96
Upper: Suede
Sock: Leather
Outsole: Rubber


Monday, August 8, 2011

My Picks: Payless Shoes

Right now Payless is having their BOGO sale where everything is Buy One Get One half off.
It seems that in the past couple of years everywhere you turn you see a big name designer doing a specialty line with a big name value store.
Payless is no stranger to this concept and has been housing guest designers for the past few years now.


Genova Elastic Strap Sandal by Silvia Tcherassi $69.99
Also comes in Black


Milano Ankle Wrap Sandal by Silvia Tcherassi $69.99
Allegra Bow Ballet by Silvia Tcherassi $49.99

Chelsea Flats $16.99
Hope Slip-ons by AirWalk $19.99

Mateos D'Orsay Ankle Strap Flats by Lela Rose $49.99
Bianca Ankle Strap from American Eagle $29.99
Topaz Twisted Sandal by Christian Siriano On Sale for $32.99
Glenda Twin Gore Moc On Sale for $17.99


Ella Cross Strap Wedge boots by Silvia Tcherassi $64.99

Soaps by Sophie


Matt stopped by tonight to drop off a care package of soaps from my sissy.

She has been making a bunch of super cute soaps lately for her etsy: Stuff By Sophie and most recently for the All Arts Market that happens about once a month in NoDa.

All her soaps are super adorable and come in yummy scents like: vanilla oak, vanilla blossom, sandalwood, black tea, orchid, eucalyptus mint and blossom woods.

My favorite is the Venus Fertility Goddess in Exotic Tuberose
They are ONLY $5 each! and are made from creamy goats milk. Why GOAT'S MILK??? You ask. Creamy goats milk is a natural soap that smooths and moisturizes your skin. Thats why!

Time Capsule Video + Zine Release

Catching waves in the city. A video about skateboarding in Charlotte and a D.I.Y. zine packaged together! Come around 8:30 to 8:45 and enjoy watching TIME CAPSULE.


I submitted my drawing for Jason's Zine today. It's a skateboarding bat that you can cut out and put together and he skateboards...kind of. Its a sort of DIY toy.

Please forgive my puffy-i'm-on-codine-and-have-a-headache-and-i'm-not-wearing-makeup-and-just-woke-up-even-though-its-6 pm face.

You can make your own here or pick up your own copy of Time Capsule @ Common Market Southend this Sunday the 14th.


You will need:
-Scissors
-Glue
-Thin Cardboard
-Thick Cardboard
-1 Round head fastener
Instructions:
Cut out all three pieces (the bat, his legs and the spacer).
Trace the bat onto the thin cardboard so you have two pieces and cut it out. Glue the bat image to one of the thin pieces of cardboard.
Trace the legs onto one piece of thin cardboard, cut out and glue image onto the cardboard-don't forget to cut out the hole in the center.
Trace the spacer image onto two pieces of the thicker cardboard then cut out the two pieces of card board.

Glue pieces together in this order: Bat image (w/cardboard) on top, spacer #1, spacer #2 then the thin cardboard piece that is shaped like the first piece.

After everything is dried the last piece (the legs) should fit inbetween the bat loosely.
Stick the fastener through the top of the bat so it goes through the hole in the center of the legs piece and all the way through the last piece.
Once it is fastened you should be able to roll the legs round so the bat looks like he is skating.

I will re-post a better tutorial once I get my cardboard.

Wisdom Teeth

Got my wisdom teeth taken out last Friday and ever since I have been home stoned outta my mind (at least that's what I feel like).
My face still hurts a little and I still can't eat solid foods.
All I want is a cheeseburger and I DON'T EVEN EAT CHEESEBURGERS!
Good grief
Only the left side of my face is swollen for some reason.
I feel like...

This medicine they have me on makes me feel crazy. Not really CRAZY, but more disoriented and super sleepy. It makes me feel like things are in slow motion.


Then this shit happens


What. the. hell.

Thursday, August 4, 2011

The B-52's


Just bought my tickets to The B-52's this coming Saturday in Greensboro!!! I can not wait!

Wednesday, August 3, 2011

DIY: skull and pearl necklace

Saw this skull and pearl necklace by Vanessa Arizaga in this month's Teen Vogue for $150.
It's absolutely adorable. I love the contrast of the skulls with the sweet look of the pearls.
She manages to bring a variety of different elements and juxtapose them into one piece.
These are a few of my favorite pieces by her.


Her's are made from multi glass pearls and hand painted ceramic skulls.


I will attempt to make one of the skull pearl necklaces for a fraction of the price.

For mine I will be using:
-8mm Glass pearls (white with an undertone of green) 50 pcs. $1.99 - Hobby Lobby
-White Kato Polyclay $1.99 - Hobby Lobby
-Silk thread $3.50
-Black Acrylic Paint
-Clear Nail Polish
-Lobster clasp (you can find a pack of about 18 for around $2)
-French wire $2
-Paint Brush with a fine point tip
-Toothpick or anything with a hard fine tip
(for an even cheaper and simpler version, just buy a little spool of stretch magic instead, just make sure you can stretch it over your head with out it breaking)

I started by laying down a piece of wax paper as my work surface.
Clean your hands before starting because every piece of dust and lint will get trapped in the clay.
Cut the clay into even pieces. I ended up cutting them into half the size shown below.
Roll the pieces into balls to see if they are the right size. I chose to make mine a little bit larger than the pearls.
1/4 of the clay makes about 14 skulls.

Then I rolled the balls of clay into the shape of a skull.
(Front)

(Side)

The top of the head should be larger and rounder and the bottom should be narrow and more oval.
I used the end of a paint brush to make indentions for the eyes and a toothpick for the nostrils.

Don't worry if they aren't exactly the same. Personally I like the fact that they look a little irregular.

I stuck them in the refrigerator for a few minutes to let them harden before inserting the toothpicks so the thread can be strung through.
You have to be careful with this part. You may have to re-sculpt the head as you are inserting the toothpick otherwise it may get a little squished.

Bake in the oven at 300 degrees F for about 10 mins.

After you take them out of the oven, let them cool completely before you start to paint.
Paint the features on the skull using black acrylic paint.

Allow the paint to dry completely then apply an even coat of clear nail polish over the entire skull.
I applied 3 coats to make it look really glossy.

After your new skull beads are dried take your thread and string up your pearls and skulls. Depending on how long you want your necklace to be you can add or take away as many pearls and beads to your liking.
For mine I used 30 pearls and 12 skulls.
(Optional) Make sure you tie a knot between each pearl or bead to keep the pearls from rubbing. This will make it last longer and look more professional.
The entire process for stringing 60 pearls can take an average of 1.5 hours.

Here is a really good tutorial on how to string a pearl necklace.

Part 1
Part 2